
Daikin Troubleshooting Guide: A Comprehensive Overview
Navigating Daikin AC issues? This guide details error codes, solutions, and safety measures for effective troubleshooting, ensuring optimal performance and longevity.
Understanding Daikin Error Codes
Daikin air conditioners utilize error codes as a diagnostic tool, signaling malfunctions within the system. These codes, often displayed as a combination of a letter and a number (e;g., A1, C4, E0), pinpoint specific issues, streamlining the troubleshooting process. Recognizing these codes is crucial for efficient repairs, potentially saving time and costly service calls.
The error code system allows users and technicians to quickly identify the source of the problem, whether it relates to the indoor unit, outdoor unit, or a more general system failure. Each code corresponds to a defined issue, ranging from minor problems like a clogged air filter to more serious concerns like a refrigerant leak or PCB defect. Understanding the code’s meaning is the first step towards a resolution.
Importance of Error Code Identification
Accurate error code identification is paramount for effective Daikin AC troubleshooting. Ignoring or misinterpreting these codes can lead to incorrect repairs, potentially worsening the problem and incurring higher costs. Prompt identification allows for targeted solutions, preventing further damage to the unit and restoring optimal performance.
Furthermore, knowing the error code enables users to perform simple fixes themselves, such as cleaning air filters or checking the drain line, before calling a technician. This self-diagnosis can save both time and money. Correctly identifying the code also provides technicians with vital information, accelerating the diagnostic process and ensuring a precise, lasting repair. Utilizing online databases and the official Daikin website aids in accurate interpretation.
Locating the Error Code Display
Finding the error code display on your Daikin unit is the first step in troubleshooting. Typically, the indoor unit’s display panel will illuminate with an error code when a malfunction occurs. This display often uses a combination of letters and numbers, like “A1” or “C4”, to indicate the specific issue.
In some models, the error code is communicated through a series of beeps – a long beep might signify one code, while a sequence of short beeps represents another. Refer to your Daikin unit’s manual for the specific beep code interpretation. If the indoor unit lacks a display, the error might be indicated on the outdoor unit, or require a technician’s diagnostic tool to reveal.

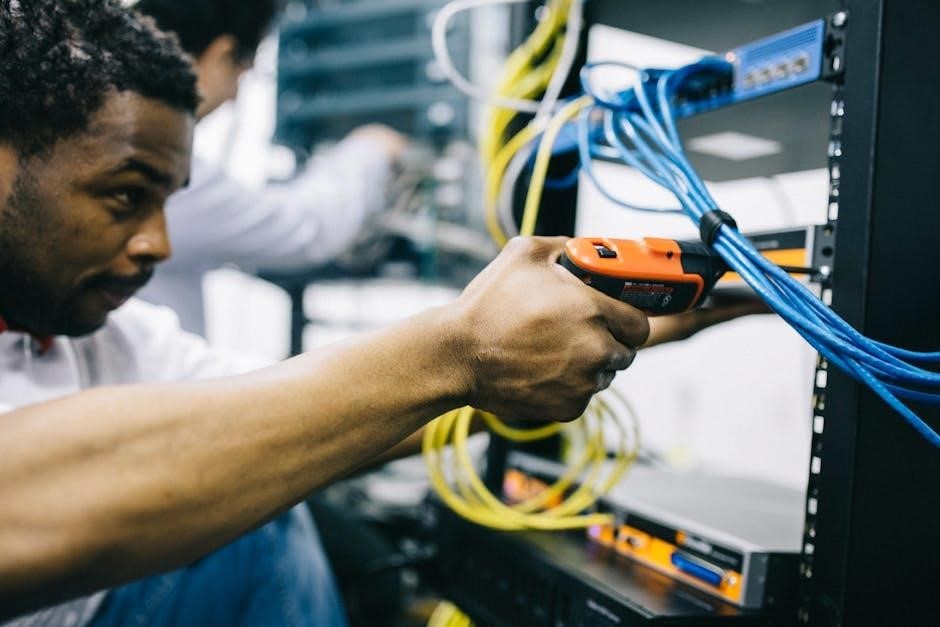
Common Daikin Error Codes & Solutions ─ Indoor Unit
Indoor unit issues are frequent. Common codes like A1, A3, A5, and A6 signal PCB defects, drain problems, heating errors, or fan motor failures.
Error Code A1: Indoor PCB Defect
Error Code A1 indicates a problem with the indoor unit’s Printed Circuit Board (PCB). This is a critical component controlling various functions within the indoor unit, and a defect can manifest in several ways, potentially halting the air conditioning process. Troubleshooting typically involves a visual inspection of the PCB for any obvious signs of damage, such as burnt components or swollen capacitors.
However, diagnosing a PCB defect often requires specialized tools and knowledge. A multimeter is used to check for continuity and voltage levels, verifying if the board is receiving power and distributing it correctly. Replacing the PCB is often the only solution, and this should ideally be performed by a qualified HVAC technician due to the complexity and potential for electrical hazards. Attempting a repair without proper expertise could lead to further damage or safety risks.
Error Code A3: Drain Level Control System Error
Daikin error code A3 signals an issue with the drain pump or the system responsible for managing condensate water. This typically means the drain pump isn’t functioning correctly, preventing proper water removal from the indoor unit. Consequently, water can accumulate, triggering the error and potentially causing water damage.
Initial troubleshooting should focus on checking the drain line for clogs – a common culprit. Inspect the drain pan for standing water. If the line is clear, the drain pump itself may be faulty and require replacement. Verify the pump receives power and isn’t physically obstructed. A technician can test the pump’s functionality directly. Ignoring this error can lead to significant water damage and mold growth, so prompt attention is crucial.
Error Code A5: Antifreeze/Cooling Mode Heating Error
Daikin error code A5 indicates a problem when the unit attempts to provide heating while in cooling or antifreeze mode. This suggests a conflict in the system’s operation, often stemming from issues with the reversing valve, sensors, or control board. The reversing valve is crucial for switching between heating and cooling cycles; a malfunction here is a likely cause.
Troubleshooting involves checking the refrigerant levels, as insufficient refrigerant can cause this error. Inspect the outdoor unit’s temperature sensors for accuracy. A faulty control board could also be the source, misinterpreting signals and triggering the error. This issue often requires a qualified technician to diagnose and repair, as it involves complex system interactions and potential refrigerant handling.
Error Code A6: Fan Motor Error
Daikin error code A6 signals a problem with the indoor unit’s fan motor. This could range from a simple obstruction preventing the fan from spinning to a complete motor failure. Initial checks should focus on identifying any physical blockages – debris, ice buildup, or foreign objects – hindering fan movement. A seized fan motor will often trigger this error.
If no obstructions are found, the issue likely lies within the motor itself or its associated circuitry. Inspect the fan motor capacitor for signs of bulging or damage, as a faulty capacitor can prevent the motor from starting. A technician may need to test the motor windings for continuity and resistance. Replacement of the fan motor or capacitor may be necessary to resolve the issue.

Common Daikin Error Codes & Solutions ⸺ Outdoor Unit
Outdoor unit errors often indicate compressor or electrical issues. Diagnosing these requires careful attention to detail and potentially professional assistance for repair.
Error Code C4: Liquid Pipe Thermistor Failure
Understanding Error Code C4: This Daikin error code signifies a malfunction within the liquid pipe thermistor, a crucial component responsible for monitoring refrigerant temperature. The thermistor’s primary function is to provide accurate temperature readings to the control board, ensuring efficient and safe operation of the air conditioning system. When a failure occurs, the system may not cool effectively, or could potentially experience damage.
Potential Causes: Several factors can contribute to a C4 error. These include a faulty thermistor itself, damaged wiring connecting the thermistor to the control board, or a loose connection. Environmental factors, such as corrosion due to prolonged exposure to the elements, can also play a role.

Troubleshooting Steps: Begin by visually inspecting the wiring and connections for any signs of damage or looseness. If the wiring appears intact, the thermistor itself likely needs replacement. Caution: This repair is best left to a qualified HVAC technician.
Error Code E0: General Protective Device Activation
Decoding Error Code E0: The Daikin E0 error code indicates that a general protective device within the system has been activated. This is a broad error, meaning it doesn’t pinpoint a single component failure, but rather signals that something triggered a safety shutdown to prevent damage. It’s a critical alert requiring immediate attention.
Common Triggers: Several issues can cause E0. These include overcurrent situations, high pressure within the refrigerant lines, or a problem with the compressor. It could also be related to a faulty sensor sending incorrect data to the control board, leading to a false activation of the protective device.
Troubleshooting Approach: Due to the general nature of this error, professional diagnosis is strongly recommended. Attempting repairs without proper knowledge could worsen the problem. A technician will systematically check for the underlying cause, utilizing specialized tools and expertise.
Error Code E2: Overcurrent Protection
Understanding the E2 Error: The Daikin E2 error code signifies that the unit’s overcurrent protection system has been triggered. This means an excessive amount of electrical current was detected, potentially posing a risk to the system’s components. It’s a safety mechanism designed to prevent damage from electrical surges or component failures.
Potential Causes: Several factors can lead to an E2 error. These include a failing compressor, a stuck or failing fan motor, or wiring issues causing a short circuit. Voltage fluctuations in the power supply can also contribute to this error. A faulty capacitor within the system is another common culprit.
Troubleshooting Steps: Disconnect power immediately. Do not attempt to reset the unit repeatedly. Professional diagnosis is crucial, as electrical issues can be dangerous. A qualified technician will inspect wiring, test components, and verify proper voltage levels.

Advanced Troubleshooting Techniques
Beyond basic checks, delve into drain line inspections, air filter assessments, and power supply verification for pinpointing complex Daikin AC issues effectively.
Checking the Drain Line
A clogged drain line is a frequent culprit behind Daikin AC errors, particularly those related to water leakage or the A3 error code. Begin by locating the drain line – typically a PVC pipe exiting the indoor unit. Carefully inspect it for any visible obstructions like algae, mold, or debris.
You can attempt to clear minor blockages using a wet/dry vacuum to suction out the clog. For more stubborn obstructions, a flexible wire or pipe cleaner can be gently inserted to dislodge them.
Important: Always disconnect the power to the unit before performing any drain line maintenance. Regularly flushing the drain line with a diluted bleach solution (follow manufacturer’s instructions) can prevent future clogs and maintain optimal AC performance. A clear drain line ensures proper condensation removal, preventing water damage and operational issues.
Inspecting the Air Filters
Dirty air filters significantly impact Daikin AC efficiency and can trigger error codes due to restricted airflow. Locate the air filters, usually behind a removable panel on the indoor unit. Regularly – ideally monthly – inspect the filters for accumulated dust, dirt, and debris.
If the filters appear dirty, remove them and clean them thoroughly. Washable filters can be rinsed with water and allowed to dry completely before reinstallation. Disposable filters should be replaced with new ones of the correct size and type.
Maintaining clean air filters improves air quality, reduces strain on the system, and prevents potential malfunctions. Neglecting filter maintenance can lead to reduced cooling capacity and increased energy consumption.
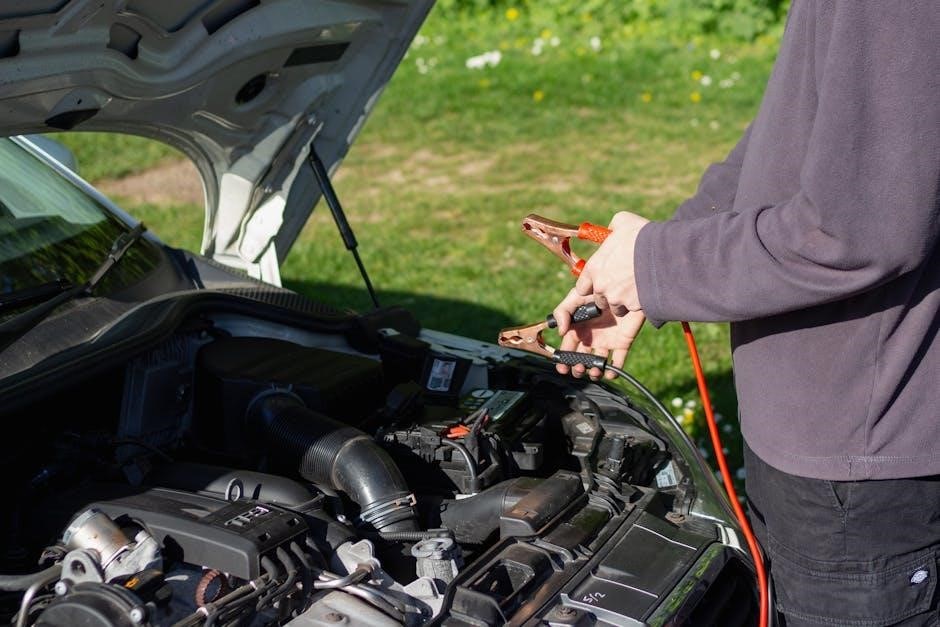
Verifying Power Supply
A stable power supply is crucial for proper Daikin AC operation. Begin by checking the circuit breaker dedicated to the air conditioning unit. Ensure it hasn’t tripped; if it has, reset it. If the breaker trips repeatedly, it indicates a potential electrical issue requiring professional attention.
Next, verify the voltage at the outdoor unit. Use a multimeter to confirm it matches the unit’s specified voltage. Loose wiring or a faulty capacitor can cause power supply problems. Inspect the wiring connections for tightness and signs of damage.
Always disconnect power before inspecting any electrical components. If you’re uncomfortable working with electricity, consult a qualified HVAC technician.

Resetting Your Daikin Unit
Attempt a reset after troubleshooting. Soft resets are simple power cycles, while hard resets may involve specific button sequences for recovery.
Soft Reset Procedure
Performing a soft reset is the first step in resolving many Daikin AC issues. This simple procedure involves completely powering down the unit and then restarting it. Begin by locating the main power switch, typically found on the indoor unit or near the electrical disconnect for the outdoor unit. Turn this switch to the “OFF” position and allow the system to remain powered off for a minimum of 60 seconds. This allows any residual electrical charge to dissipate, effectively resetting the system’s internal components.
After the waiting period, return the main power switch to the “ON” position. The Daikin unit should now power back on and initiate its normal startup sequence. Observe the unit closely to see if the error code has cleared and the system is functioning correctly. A soft reset often resolves minor glitches and temporary errors without requiring more complex troubleshooting steps. If the error persists after a soft reset, proceed to more advanced troubleshooting techniques or consider a hard reset.
Hard Reset Procedure
A hard reset, unlike a soft reset, involves disconnecting the power supply entirely, offering a more thorough system reset for persistent Daikin AC errors. Begin by switching off the unit using the remote control, then locate the circuit breaker dedicated to the air conditioning system in your electrical panel. Turn off this breaker to completely cut power to both the indoor and outdoor units.
Allow at least five minutes for the system to fully discharge. This ensures all capacitors are depleted, crucial for a successful hard reset. After the waiting period, switch the circuit breaker back on, restoring power to the Daikin unit. Power on the indoor unit and observe if the error code has been cleared. If the error persists after a hard reset, it indicates a more significant issue requiring professional attention, potentially involving component failure or complex system malfunctions.

Safety Precautions for Daikin Troubleshooting
Prioritize safety! Disconnect power before inspection, avoid refrigerant handling without certification, and consult a professional for complex repairs to prevent hazards.
Electrical Safety
Working with electrical components demands utmost caution. Always disconnect the Daikin unit from the main power supply before attempting any troubleshooting or repairs. This prevents electric shock and potential damage to the system. Verify the power is off using a non-contact voltage tester.
Never handle wiring with wet hands or while standing in a damp environment. Inspect all wiring for fraying, damage, or loose connections. If you discover any issues, do not attempt to repair them yourself unless you are a qualified electrician. Improperly repaired wiring can create fire hazards or cause the unit to malfunction.
Remember that capacitors can store an electrical charge even after the power is disconnected. Discharge capacitors properly before handling them. If you are uncomfortable working with electrical components, always consult a certified HVAC technician;
Refrigerant Handling
Refrigerant handling requires specialized knowledge and equipment. Daikin units utilize refrigerants that can be harmful if released into the atmosphere or come into contact with skin and eyes. Never attempt to open refrigerant lines or handle refrigerant directly unless you are a certified HVAC technician with the proper EPA Section 608 certification.
Refrigerant leaks must be addressed immediately by a qualified professional. Releasing refrigerant into the environment is illegal and damaging to the ozone layer. Technicians use specialized tools to recover, recycle, and recharge refrigerant safely and efficiently.
If you suspect a refrigerant leak, ventilate the area and contact a professional. Do not attempt to locate or repair the leak yourself. Improper handling can lead to serious health risks and environmental damage.
Resources for Further Assistance
Need more help? Explore the official Daikin website for support, manuals, and online error code databases for detailed troubleshooting information.

Daikin Official Website & Support
Daikin’s official website is a primary resource for comprehensive support and troubleshooting materials. You’ll find detailed product manuals, frequently asked questions (FAQs), and a dedicated support section to address common issues. The website often features a searchable database specifically for Daikin error codes, allowing you to pinpoint the cause of a malfunction based on the displayed code.
Direct contact with Daikin support is also available through their website, typically offering options for phone support, email inquiries, or live chat assistance. These channels provide access to trained technicians who can offer personalized guidance and potentially schedule service appointments if needed. Furthermore, the site may host downloadable resources like wiring diagrams and parts lists, beneficial for more advanced troubleshooting or repairs.
Remember to have your unit’s model number readily available when contacting support, as this will help them provide the most accurate and relevant assistance.
Online Daikin Error Code Databases
Numerous third-party websites compile Daikin error codes and their corresponding solutions, offering a convenient alternative or supplement to the official Daikin resources. These databases often present information in a user-friendly format, allowing for quick searches based on the error code displayed on your unit. Many include explanations of the potential causes and suggested troubleshooting steps, ranging from simple fixes like filter cleaning to more complex repairs.
However, exercise caution when using these resources. Verify the credibility of the website and cross-reference information with the official Daikin documentation whenever possible. Some databases may contain inaccurate or outdated information. Look for sites with active user forums where experienced individuals discuss Daikin AC issues and share their expertise.
Utilizing multiple sources can provide a more comprehensive understanding of the error and potential solutions, increasing your chances of a successful repair.